Having never attended a formal cooking class, I found myself a bit nervous when I arrived at the Whole Foods Culinary Center in downtown Austin, TX. However, from the moment I walked in, it was quite inviting and smelled delicious! Cookbooks lined the entry way and a well stocked modern test kitchen was behind a large glass wall for onlookers to see what was the day’s project. Our friendly teacher Summer Pruett-Gosnay, Pastry Chef owner of Stardust Pastry, made the experience so much fun that I know this definitely won’t be my only class that I’ll take.
The class title was “Icing on the Cake” and the class description promised to teach you techniques to make a beautiful cake. ( Not to mention that I got to take home a piping set and the finished cake just in time for Mother’s Day!) We started off reviewing a handout with basic recipes for white cake and buttercream icing.
Some interesting things I learned probably had nothing to do with icing a cake but rather random tidbits of knowledge that I want to share with you:
- Did you know that American recipes call for oil as their main fat versus French recipes that call for butter? (I guess that would explain why all the cakes in a box ALWAYS call for oil and NEVER call for butter!)
- If you are making a basic recipe that calls for just flour and you want to make it in a chocolate version you simply do half flour and half cocoa powder. For example of the recipe calls for 2 cups of flour, use 1 cup flour and 1 cup cocoa powder. It’s THAT easy! I think that will be very helpful when I’m in search of something to satisfy my chocolate cravings! Now I can adapt that to make chocolate pancakes, waffles, you name it!! I’m so excited to learn that trick.
- When making layered cakes, a trick Summer uses is brushing simple syrup on top of each layer to retain moisture and keep the cake fresher longer. Who would of thought?!
- Be aware of the cooking sprays you use. Be sure to check the ingredients and make sure that there is no silicone in it. Apparently after it reaches a certain temperature it can turn poisonous!
So if you are wondering, just how do you make a layered cake here’s a quick run down:
1) Bake your desired type of cake and let cool. It is easier to ice a COLD cake so it’s not a bad idea to plan ahead and bake the cake the day before you plan to decorate it.
2) Take a long serrated knife and shape the top of your cake into a nice flat round surface. Continue to use the knife to slice your cake into 2 equal halves for your 2 layers.

3) To keep cake moist, brush simple syrup (which is a combination of equal parts water and sugar that’s been boiled and cooled) on top of first layer and then top with frosting.
4) Place 2nd layer on top and repeat process with syrup and frosting.
5) Next, frost the sides of the cake generously. This is your first coat, so don’t be too concerned with crumbs being visible. Scrape the edges to get nice clean lines with a Multi-Purpose Pastry Scraper.
6) Then you will add a second coat of frosting that you will spread evenly to make sure it’s presentable.
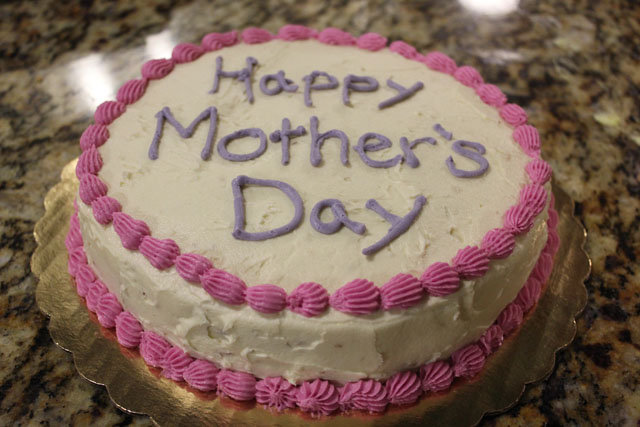
7) Finally, decorate it as you wish with colored frostings or other cake decor elements.

Here’s my finished product for my first attempt:

Check out pictures of all the cakes on our Facebook page!